 Every aspect of infection control is important in a dentist’s office. So as preserving and protecting the expensive tools necessary for proper diagnosis and treatment.
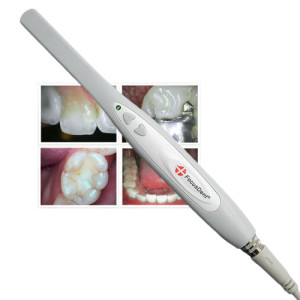
The intraoral dental camera presents a unique set of challenges to the dentist. Its exposure to patients’ blood and saliva makes it a potential source of contamination. Still, it is a delicate and intricate machine, more sensitive to the types of sterilization used on other dentists’ tools. Your camera’s electronics cannot get too wet. Your lens would toast in an autoclave or other heat-based sterilization processes.
Failure to follow the exact process can cause damage to expensive equipment or contamination to patients. You would not want to risk both.
Given those restrictions, training staff members in the proper cleaning of an intraoral camera is a high priority.
1.) Check the owner’s manual.
It can be devastating to the longevity of your equipment if you do not read the instructions manual. Each intraoral camera is different and may have different specifications for cleaning. Some brands specify that you can wipe the lens with an alcohol wipe, while others recommend against ever touching the glass.
Don’t do anything to it that a regular camera could not withstand. In particular, avoid using a dry cloth on the lens as it may cause minuscule scratches on the glass. While the scratches may not be visible to the naked eye, it can affect the quality of images received. Just as important, when a smooth surface becomes damaged in any way, it becomes a breeding ground for bacteria.
2.) Dispose of the camera sheath.
While it can be tempting to attempt to clean and reuse the camera sheath, its design is for single use only. You should dispose of it after every use of the intraoral camera. There is no safe way to clean and reuse this piece of the camera. Never use the camera without a new camera sheath in place and never attempt to clean one that you already used. It is an important part of infection control that you should practice, even when examining members of the same family.
3.) Place the camera on a disposable liner or disinfectable tray.
Put the camera on a disposable liner or sterile surface after each patient. Discard the disposable gloves used during the camera’s use. Wash your hands, even though you wore gloves. Gloves can have imperfections that would allow contaminants to reach your skin.
Train your staff members to do the same.
4.) Inspect the camera for contamination.
If you see blood or saliva in other parts of the camera not covered by the sheath, such as the USB cable, clean it with an antibacterial cloth. Wait at least 30 seconds to allow the first application to dry. Then, using a fresh wipe, disinfect the camera a second time. Dry with a lint-free towel.
5.) Rinse with a sterile lab sponge soaked in de-ionized water while avoiding the lens.
The chemicals used for the sterilization process can create a buildup of deposits on the camera. You can prevent this by rinsing it with de-ionized water on a sterile sponge. Be careful not to make the sponge too wet as moisture can be detrimental to the sensitive electronics of your intraoral dental camera. Use a dry sterile lab sponge to remove excess moisture.
6.) Wear disposable gloves when replacing the disposable camera sheath. Discard gloves after.
Cleaning a dental intraoral camera is more involved than setting metal tools aside for sterilization in an autoclave. The temptation to make sure the camera is clean by heat sterilization can be great but will result in the need to buy a new camera. Extreme heat will either fry the electronic components of the camera or warp the lens, resulting in inaccurate images.
Chemical sterilization is just as effective as heat sterilization. It is even safer for delicate equipment if you follow each procedure every time.
Never immerse the camera in chemical sterilization fluids. Immersion in the fluid can allow liquid to reach the electronics inside, causing the camera to short circuit. The liquid can also penetrate the region near the glass, leaving a liquid residue on the lens, causing clouding.
The proper cleaning of intraoral cameras demands proper attention just like good dental care. Just like how dentists tell their patients to spend time and money for oral hygiene, they should do the same in taking care of their dental equipment.